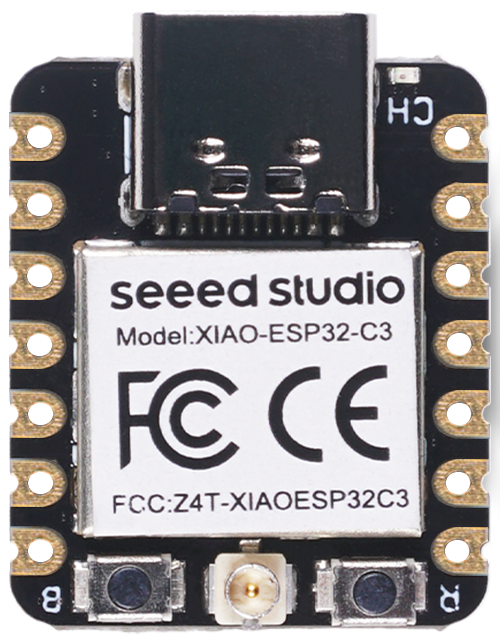
The tutorials and procedures in this article can be used on XIAO ESP32 series products (XIAO ESP32S3, XIAO ESP32C3, XIAO ESP32C6, etc.), and you can choose any one of the XIAO ESP32 series products to complete the contents of this tutorial.
| XIAO ESP32S3 | XIAO ESP32C3 | XIAO ESP32C6 |
|---|---|---|
In addition to the master MCU, we need to prepare the Grove Vision AI V2 and supported cameras in order to complete the content of this project.
If you want to use another camera, you can read the list of supported cameras here for more information.
If this is your first time using the product Grove Vision AI V2, we recommend you read the Wiki below to learn and use SenseCraft AI and understand how to upload models. And learn how to install the Arduino library for Grove Vision AI V2.
Alarm when detecting the target using the Grove Vision AI V2 and XIAO ESP32, can be placed in some dangerous areas to remind people to stay away, or to warn pets to stay away from the kitchen or bedroom.
For this project we are going to use face recognition as an example, so that we need to use for the Grove Vision AI V2 is a face recognition model. You can upload this model using SenseCraft AI and watch the detection in the preview window.
:::tip
This is an example of face recognition, if you want to target pets, you can use SenseCraft AI to upload a model for “Pet Detection” and it will work just as well.
:::
Here we use the Expansion Board Base for XIAO (with buzzer) for ease of wiring, the Grove Vision AI V2 is simply connected to the IIC interface of the XIAO through the Grove interface, and the Grove-Red LED is connected to the A0-D0 port of the expansion board.
Below is the complete program for this project, please compile and upload this program for XIAO ESP32 series.
#include <Seeed_Arduino_SSCMA.h>
#include "time.h"

SSCMA AI;

#define  LED_PIN  D0
#define USER_BUZZER D6
#define PWM_PERIOD 255

volatile uint16_t buzzerValue = 0;
hw_timer_t * time_buzzer = NULL;
hw_timer_t * time_recognition = NULL;
bool past_recog = false;
bool current_recog = false;
volatile bool recognition_flag = false;

void IRAM_ATTR set_recognition_flag() {
    recognition_flag = true;
}

void func_buzzer(){
  static uint8_t buzzerCount = 0;
  if (++buzzerCount < buzzerValue) {
    digitalWrite(USER_BUZZER, LOW);
  }
  if (buzzerCount >= PWM_PERIOD) {
    buzzerCount = 0;
    digitalWrite(USER_BUZZER, HIGH);
  }
}

void setup()
{
    pinMode(LED_PIN, OUTPUT);
    digitalWrite(LED_PIN, LOW);
    pinMode(USER_BUZZER, OUTPUT);
    Serial.begin(9600);
    while(!Serial)
    {
        delay(1000);
    }
    AI.begin();
    while(!AI.begin())
    {
        delay(1000);
    }
    Serial.println("wire is ready");
    Serial.println("initial finished");
    delay(1000);

    time_recognition = timerBegin(0, 80, true);
    timerAttachInterrupt(time_recognition, &set_recognition_flag, true);
    timerAlarmWrite(time_recognition, 1000000, true);
    timerAlarmEnable(time_recognition);
    time_buzzer = timerBegin(2, 80, true);
    timerAttachInterrupt(time_buzzer, &func_buzzer, true);
    timerAlarmWrite(time_buzzer, 10, true);
    timerAlarmEnable(time_buzzer);
}

void loop()
{
    // Handle recognition logic
    if (recognition_flag) {
        recognition_flag = false;
        if (!AI.invoke())
        {
            Serial.println("invoke success");
            Serial.print("perf: prepocess=");
            Serial.print(AI.perf().prepocess);
            Serial.print(", inference=");
            Serial.print(AI.perf().inference);
            Serial.print(", postpocess=");
            Serial.println(AI.perf().postprocess);
            for (int i = 0; i < AI.boxes().size(); i++)
            {
                Serial.print("Box[");
                Serial.print(i);
                Serial.print("] target=");
                Serial.print(AI.boxes()[i].target);
                Serial.print(", score=");
                Serial.print(AI.boxes()[i].score);
                Serial.print(", x=");
                Serial.print(AI.boxes()[i].x);
                Serial.print(", y=");
                Serial.print(AI.boxes()[i].y);
                Serial.print(", w=");
                Serial.print(AI.boxes()[i].w);
                Serial.print(", h=");
                Serial.println(AI.boxes()[i].h);
            }
            current_recog = (AI.boxes().size() > 0);
        }
        else
        {
            Serial.println("invoke failed");
            current_recog = false;
        }
    }
    // Check for recognition state changes
    if (past_recog != current_recog )
    {
        past_recog = current_recog;
        if (!past_recog)
        {
            buzzerValue = 0;
            digitalWrite(LED_PIN, LOW);
            Serial.println("nobody here");
        }
        else
        {
            buzzerValue = 128;
            digitalWrite(LED_PIN, HIGH);
            Serial.println("there is someone here");
        }
    }
}
If the programme runs smoothly, you should see the effect shown as the vedio in the result.zip.
:::note
If you want to use a specific audio as a warning, the MP3 V4.0 need to be added. Download your audio to an SD card and rename it "test1.mp3", insert the SD into the card slot of the MP3 module, plug the module into the UART port of the expansion board and upload the "light_and_audio_warning.ino" into XIAO-C3.(However, the “WT2605C_Player.h” header file seems to have some errors, please be patient, we will fix it as soon as possible)
:::
The code structure is as follows
- Include necessary libraries:
- Seeed_Arduin_SSCMA.h`: Enables the inference function of Grove Vision AI V2.
2.Define constants:
- SSCMA AI : Creates an instance of the SSCMA class for inference.
- two hardware timers:
- timer0: used for target recognition (triggered once per second)
- timer2: for buzzer control (triggered every 10 microseconds).
- set_recognition_flag .
- Interrupt service program for recognition timer, set recognition_flag to true to indicate the need to perform the recognition task.
- func_buzzer :
- Control the PWM signal of buzzer, through buzzerCount and buzzerValue to control the buzzer on and off.
- setup_function:
- Initializes the Grove Vision AI V2 and serial communications and configures the LED pin (D0) and buzzer (D6) as outputs.
- loop function:
- Check if recognition_flag is set to true, if yes, call AI.invoke() for target recognition.
- After successful recognition, print the recognition result and update current_recog.
- If the recognition status changes (from recognized to not recognized or vice versa), update the status of the LED and buzzer.


